Create Your Own Instance
An instance is your server's modpack as the launcher sees it: a description plus a list of files. There are two ways to publish one.
| Route | Best for | What you need |
|---|---|---|
| Neko Dashboard (recommended) | Anyone running a server for other players | A free account at neko-launcher.com/dashboard |
| Self-hosted with DNS | Owners who already host files and control a domain | Any HTTPS file host and a DNS TXT record |
Both produce the same result for players: they search your server, press Play, and stay in sync.
Loading diagram…
Route A — Neko Dashboard
1. Sign in and pick a workspace
Go to neko-launcher.com/dashboard and sign in with Microsoft. A personal workspace on the FREE plan is created for you. Plans decide how many instances, how much storage and how many whitelisted players you get; see Workspaces and plans.
2. Create the instance
Instances → New instance. Give it a display name, a short description, the Minecraft version and the mod loader (Fabric, Forge, Quilt or NeoForge, with a specific build). The instance starts PRIVATE: only you can see it until you decide otherwise.
3. Add the files
Open the Files tab. You can:
- drop a .mrpack — the modpack's mods are linked from Modrinth and its overrides are uploaded;
- upload folders and files (mods, config, resource packs, shader packs) with the file manager;
- search Modrinth and install mods directly.
Files uploaded through the dashboard are stored privately; Modrinth mods are downloaded by players from Modrinth's CDN. See Files and versions.
4. Decide what players may change
In Settings, the ignored list names paths the launcher writes once and never overwrites: options.txt, resourcepacks, shaderpacks, screenshots, key-bind and HUD configs. Presets exist for common mods. Everything else follows your published version exactly when read-only is on.
5. Publish a version
Every change is a draft until you publish a version (for example 1.0.0) with a changelog. Players sync to the active version; you can roll back to an earlier one at any time.
6. Choose who gets in
Still in Settings:
- Visibility — PRIVATE (whitelist only), UNLISTED (anyone with the name), PUBLIC (listed in Discover once approved).
- Enforce whitelist — keep a PUBLIC or UNLISTED server visible but lock its files to whitelisted players.
- Whitelist — add players by UUID or name, or let them apply through a form; see Whitelist and applications.
- Entry fee — charge after approval; see Entry fee.
- Online mode — refuse offline accounts.
- Hide mods — keep the modpack's mods out of the mods folder on players' machines; see Instances.
7. Hand it to players
- Invite link — Invites tab → create a link https://neko-launcher.com/j/<code>. It can expire, be limited to a number of uses, or be revoked.
- Name — players can type the instance name into the launcher's search.
- Discover — request listing; see Discovery.
Route B — Self-hosted with DNS
Host two files and add one DNS record. The launcher fetches them directly from your server; the Neko API is not involved.
1. Write instance.json
The instance settings, following schema v2:
{
  "$schema": "https://cdn.neko-launcher.com/schema/neko-launcher.json",
  "name": "my-server",
  "displayName": "My Server",
  "description": "Fabric survival with friends.",
  "icon": "https://cdn.example.com/icon.png",
  "onlineMode": true,
  "minecraft": {
    "version": "1.21.8",
    "loader": { "type": "fabric", "build": "0.17.3", "enable": true }
  },
  "metadata": { "wallpaper": "https://cdn.example.com/wallpaper.webp" },
  "ignored": ["options.txt", "resourcepacks", "screenshots", "logs"],
  "readonly": true,
  "gameArgs": ["--quickPlayMultiplayer=play.example.com"],
  "socials": [{ "type": "discord", "url": "https://discord.gg/example" }]
}json
2. Write manifest.json
One entry per file, with a SHA-1 hash, following manifest schema v2:
[
  { "path": "mods/fabric-api.jar", "url": "https://cdn.example.com/mods/fabric-api.jar", "size": 2154321, "hash": "3f786850e387550fdab836ed7e6dc881de23001b" },
  { "path": "config/server.toml", "url": "https://cdn.example.com/config/server.toml", "size": 812, "hash": "89e6c98d92887913cadf06b2adb97f26cde4849b" }
]json
Generate hashes with sha1sum (Linux/macOS) or Get-FileHash -Algorithm SHA1 (PowerShell).
3. Host both files over HTTPS
Any static host works: your own web server, an object store, a CDN. Both URLs must be reachable without cookies. Test them:
curl -sI https://cdn.example.com/instance.json | head -1
curl -s https://cdn.example.com/manifest.json | head -c 200bash
4. Add the DNS TXT record
At _nekolauncher.<your domain>:
v=2;ip=play.example.com;settings=https://cdn.example.com/instance.json;manifest=https://cdn.example.com/manifest.json
Full key list and provider notes: DNS discovery.
5. Test in the launcher
Search for play.example.com. A green card means both files were fetched and the instance is installable.
The launcher's Create wizard
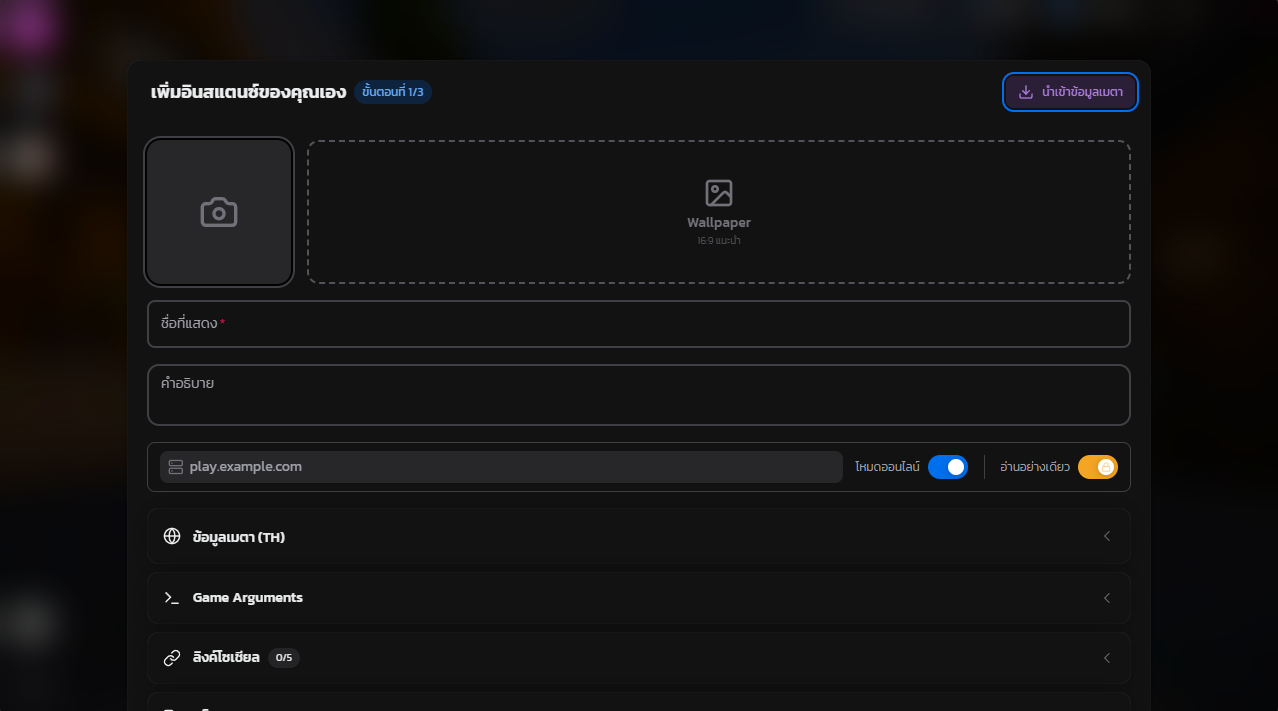
The launcher also has a Create New wizard (Search → + New instance → Create New) that builds instance.json and manifest.json from a .mrpack, uploads them, and can add the TXT record through Cloudflare for you. The steps are the same as above with the files generated for you:
 View Image
Access control on each route
| Dashboard | Self-hosted | |
|---|---|---|
| Who may install | Visibility + whitelist + workspace membership, enforced by the API | Your server decides, using the X-UUID, X-Username and online headers the launcher sends |
| Applications, invite links, entry fee | Built in | Not available |
| File hosting | Neko storage or Modrinth | Yours |
| Updates | Publish a version | Change the files, players sync on next launch |